Showing posts with label techniques. Show all posts

Wednesday, May 29, 2019

The Only Cast-on You Need To Know for Toe-Up Socks...

...is the Turkish cast-on. The others (figure 8, judy's magic) are harder and do not add any additional value, IMO. The Turkish cast-on is ridiculously simple and can double as a provisional cast-on. Why use up valuable braincells on any others?

I've blogged about this one before, but it seems my favorite resources are gone off the InterWebz, so here are some photos and a little "how-to". I had to teach my local knitgroup this cast-on, which resulted in some excellent tips, which have been incorporated into this instruction set.

For first-timers, use a light coloured wool. It's easier to see what you're doing. I'll describe the process for two-at-a-time socks.

1. using one ball of the yarn, make a slipknot on one end of your circ. Hold the needles in your left hand so the tips are pointing to the right and the slipknot is on the bottom needle.  See below.

[slipknot on bottom needle]

2. Now start winding the yarn around both needles, from the back to the front ("like the sun rising over the horizon, towards you", a helpful tip from one of my knitgroup knitters!), counting as you go for each stitch thus wound - ie. cast - on. I usually do 12 to 14 stitches for a pair of grownup socks.

[start winding, up over the top, from the back to the front]

[keep going until you've wound on enough stitches]

3. When you've wound on / cast on enough, trap the yarn between the two needles to hold it while you cast on for the second sock.

[trap the yarn between the needles so you can cast on for the next sock]

4. Start with a slipknot on the bottom needle again. Note: it's a little easier to get the slipknot on if you pull the bottom needle out a little! Then wind on again, the same way as you did for the first sock, and trap the yarn between the needles again.


[slipknot on bottom needle for second sock, pull the bottom needle out a little]

[cast on complete for both socks]

5. Done, that's the cast-on. Unbelievably simple, eh? Now comes the fiddly bit, which is where you start knitting. Free the yarn from between the two needles and make sure it comes up from the bottom needle, behind both. Gently pull the bottom needle out (to the right) and use it to start knitting off the top needle. It should feel quite natural and not hard, the yarn loops should lean the correct way and it shouldn't feel like you're making twisted stitches. If it does, it means you wound on in the opposite direction ("setting sun"), so yeah, you'll need to start over.

[untrap the yarn, keep it behind the needles, and start knitting off the top needle]

6. Once you've knit both socks' worth of top-needle stitches, you'll have all the stitches on the top needle, which is now facing left, and a loop hanging on your right. Your other needle is hanging on the left, and it will shortly be the new bottom needle. Carefully and slowly push the bottom cord into the stitches and pull on the top needle, maintaining that loop on the right, until the bottom needle (rather than the cable) holds the stitches and the top needle is free. It's helpful to maintain the orientation of your knitting, don't flip it around just yet. 

[top stitches all knit, tip of needle is on the left (I'm holding it) 
and loop is on the right; 
push the bottom cable to the right, into the stitches; 
pull the top needle left, out of the stitches.]

7. Now flip everything over (swing the needle tips around 180 degrees) so that the needle holding the stitches is on top and the tip is pointing right. You'll see the slipknots on the top needle, as the first thing. Remove the slipknot. Drop it off the needle. Do not knit it. Being very careful to use the correct yarn - ie. NOT the end hanging off the slipknot! - knit the rest of the cast-on stitches. That's it. You are done, with two rows knit already, and you are ready for the cast-on part of the toe end of your sock! 

[almost ready to knit the other row; 
the slipknot is first on the top needle]

Now just continue as per usual, increasing for the toe of your socks. It's just that easy! Another tip from my knitgroup: use a YO increase every other row - it's much easier to see than a Kfb. On the plain knit rows, you can tighten them up by knitting the YO's TBL. 

Here's a photo of my socks, showing a few rows knit (and increased). You can see the cast-on is basically invisible from both front and back. 

[up close you can't see the cast-on, in the middle of this knitting]

[invisible from the back, too!]

To use this cast-on as a provisional cast-on (note: it has the same number of stitches in either direction, which is something you won't get from some other provisional cast-ons - like the crochet cast-on, for instance), cast on over a second circular needle, which you simply leave hanging. You can replace it with a holder (ex. string) later. 


Wednesday, January 24, 2018

Sweater Analysis

My friend Mary is in her 80's and an accomplished knitter. I spotted her wearing this beautiful Aran cardi a while back, and I requested the pattern...but it turns out the sweater is as old as I am and the pattern is long gone.

So, instead, she lent me the sweater for some analysis. I invite you to share on my "sweater deconstruction" journey...

Here's the sweater. Lovely, no?

[vintage aran cardigan]

Just looking at it, you can see that:
1. it's been knit flat in pieces, and sewn together. 
2. the sleeves are "set-in", not drop-shoulder or raglan
3. the font band is vertical (not picked up later and knit on), and has been knit separately and sewn on. Ditto the collar.

I think this method of construction was par for the course in the 1960's - nowadays lots of people tend to knit sweaters in the round, and do drop-sleeves, and knit on the front band and collar. 

Let's have a look at the stitch patterns to see if I can figure this puppy out. I'll start with the easiest one; the one that the sleeves are knitted out of and that runs up the sides of the sweater fronts and back:

["background" pattern]

This is pretty clearly:
R1: knit on RS
R2: purl on WS
R3, 4: K1 P1 ribbing

Then repeat, but offset the ribbing.

Right? OK. Look really really closely at the ribbing. 

[zoomyzoom on the ribbing part of the background]

The two blue arrows point to a column of sts from the ribbing rows, and the orange arrows point to the stockinette rows. You can see that the ribbing rows are twisted stitches while the stockinette is not. The left leg of each twisted stitch overlaps the right leg, whereas in the not-twisted stitches, the two legs originate from the same point. So, the actual background pattern is:

2 rows stockinette (K one row, P back)
2 rows twisted ribbing (KTBL, PTBL)
and then repeated, offset.

And don't feel bad if you got this wrong. I did, and tried plain ole' ribbing. Here's what I got, and you can see it doesn't look as nice!

[my swatch]

I was trying to get that crisp, ripply look and figured at first it was my needle size, so I kept downsizing. But you can see it didn't help! My wool is different too, of course - it's woolier than Mary's, so that doesn't help with the stitch definition - but I'm glad I decided on a closer inspection. I will have to redo the swatch now!

Next up: the bobble cabley thing:

[bobble-cable, in context]

This one's a bit harder, but it's clearly 2 rope cables twisting in opposite directions, separated by a bobble. Duh.

Now, in detail - I had to look on the inside, and stretch the knitting out to count stitches - the cables are over 5 stitches, and every twist is made of up 3 stitches in the front crossing over 2 in the back, and this is done every 4 rows. They're asymmetric, which is kinda unusual. 

Now, also notice that the right-side cable looks narrower than the left-side cable; this is particularly noticeable in the photo above. Why??

Again, let's zoom:

[zoom of bobble cables]

The stitches are again twisted! Telltale ridges are appearing along the RH cable (see yellow line to guide the eye). And, because the "through the back loop" technique twist stitches in the clockwise direction, I can imagine that a clockwise cable will look tighter than a counterclockwise one. Which is what you see in the pic above, right?

So, I have embarked on a swatch to combat this problem. It involves knitting TBL on one side of the bobble, and reseating the sts prior to knitting them, on the other side. It matters not which side you do what on; the point is that the stitch-level twist and the cable-level twist on each side are symmetric (either opposing each other, or going the same way, on each side). Of course, you could also omit the whole twist thing and just knit and purl, but then your cables will not be as tightly defined.

To reseat a stitch, you slip it knitwise to the RH needle, then transfer it back to the left while keeping the twist in place. Remove your RH needle from the stitch completely, or you will have a strong desire to knit it through the back loop, which will undo what you've just done! Now the stitch is reseated and ready for regular through-the-front knitting or purling.

Now, as to that bobble, this took me several tries, as well as some dives into stitch dictionaries to find out how to do bobbles. In the end I settled on a 5-stitch bobble. You can see my swatch below. Both cables are the same width and the bobbles look the right size. And below that, you can see where I tried plain old untwisted sts on the cables. I don't like the result as much!

[my bobbley-cable swatch, with TBL and reseated sts]

[another swatch, this time with no twisted sts]


Isn't this fun? Oh, and here's the chart:

[chart for bobble cable]

OK, almost done. Let's look at the diamond things.

[diamond pattern]

Yikes. This looks complicated. These are 4-stitch wide travelling bands defining a diamond, which is filled with moss stitch. The 4-wide bands are themselves cabled. To get this, you need to cable on both the front and the back of the work. If I use the bobble-cable on either side as a guide, I'm guessing the diamond takes 24 rows or so to complete. It stretches over 21 sts (includes 2 reverse stockinette "gutters" on either side).

Here's my chart:

[diamond pattern chart]

You'll see that I've done the travelling on the wrong side of the work (even rows) and the cabling on the right side (odd rows). I've worked up a swatch, too...

[diamond cable swatch]

I'm not entirely happy with this yet though. I think especially the diamond cable swatch is too small; too tight. I will try all these again with larger needles, now that I have figured out that the background stitch reqiures twisted sts!

I must say I am pleased that I am able to recognize a high-quality knitted garment. And close examination of it shows lots of expert-level pattern details! Mary is indeed a fine knitter.


Monday, January 22, 2018

Twined Knitting, volume 4

So after a few fingerless mitts done with twined knitting, I have now tried a pair of full mittens.

I did these 2-at-a-time, in an effort to reduce the differences between the two mittens. It turns out that:

1. 2AAT is easy on single-colour twined knitting! You can use Magic Loop or 2 circs, and you just use 2 centerpull balls and use the yarn management technique described in volume 1 of twined knitting. It's just like socks!

[twined mitts, 2AAT, in progress...]

2.  If, like I did, you want to use more than a single colour in parts of the mittens (like, say, in the cuff part), I'd recommend that you estimate how much of each colour you're going to use and wind a centerpull ball starting with one colour. Then, when you've wound up enough of that colour (example: 10 g blue for the cuff), tie on the other colour and continue winding your centerpull ball with the second colour. The result is a centerpull ball with the outside end in one colour and the inside end in the other. Ideal for bi-colour twined knitting!

[bi-colour centerpull balls, inside portion is blue and outside, white]

 3. Seems like a lot of twined colourwork is 1x1 - either vertical stripes, checkerboard, braid, or variants thereof. So in each row you use 2 colours alternately, 1 stitch each. If, like me, you want to intersperse these motifs with rows single-colour knitting, you have two options:
    • use one of the strands and do a few rows of plain stockinette (not twined knitting), or
    • tie on a second strand of the single colour and continue in true twined knitting.
Having tried both of these methods, I recommend the first - having to manage three strands, two of which are twining and one just "resting", on 2 mittens simultaneously, is a royal pain in the ass. Besides, nobody is going to see that those 2 rows are not twined.

And - perhaps obviously - if you want to execute a design that has floats longer than 1 stitch (zigzags, 2x2 checkerboard), you can still "twine" the two colours on the back over longer intervals. Or, just revert to standard stranded (ie. not twisting the floats) knitting over those portions of the design. Nobody is going to notice the difference, as the emphasis will be on the colourwork, not the structure of the knitting.

Here are some design tips:

I've learned from experience that when you do twined purl, with the yarn twisting in the front of the work, it overhangs the row below it and makes it disappear. So, in the mittens above, I knit two rows of single colour stockinette before doing each braid or ridge motif and one row after it. This makes the braid or ridge look like it is centered on a stockinette background. 

One of the fun bits of twined knitting is the "crook" stiches, which are essentially a trio: purl -knit -purl, with the float of the first purl stitch held in front of the knit stitch before being used in the second purl again. In my opinion (having tried both now), monocolour crook stitch patterning (used in the white portion of the mitts above) looks best in a light yarn, rather than in a dark one. White or light grey really makes the texture pop out more - I think because you can see the shadows. You can adapt regular stranded motifs (like scandinavian stars, or zigzag lines) to crook stitches, but the crook stitches require a minimum of 3 stitches to make, so the designs will be wider and "coarser".

You can use single crook stitches (trios) to make "bubbles", or rows of them to make a nice sort of chain (see photo below). Crook stitches done over a striped background are really effective too! 

[Latvian braid on bottom, some purple/white colourwork,
single twined purl rows in purple outlining 2 rows of white crook stitches,
crook stitches on striped background,]

I really love the effects one can get by having both twisted floats on the front of the work. "Latvian Braid" is basically twined purling, with two colours of yarn and the floats in the front of the work. These things are fun to play with, but I've found that you get a horrible jog at the beginning-of-round with them. I've not yet figured out how to solve that problem. In my mittens, I've disguised the jog by the simple expedient of sewing a cord over it - my son wanted the two mittens joined by a long decorative cord so he can keep the mittens hanging in the arms of his coat.

[finished mittens, with idiot cord]


Friday, January 12, 2018

Twined Knitting, volume 3

OK, I finished those z-ply twined mittens. Half-mittens, actually.

Here they are:

[twined half-mitts]

I am very happy with them. The fabric is amazing: very dense, yet still soft and pliable. I love the surface decoration you get with this technique - it involves nothing more complicated than carrying the floats on the front of the work, rather than on the back (the floats are never more than 1 stitch long). 

While the outside of the knitting doesn't look that different from regular stockinette, the inside is quite different:

[inside view of twined knitting]

All those twists create little ridges on the back of the work and make it thick and lofty. I'm sure this would make amazing slippers! 

I find that my gauge is quite different with this technique: it's much tighter. So although the mitts were supposed to be husband-sized, they ended up being 2 sizes to small and therefore are now mine! So I've done another pair, using standard s-ply yarn (Palette from KnitPicks, which is fairly loosely plied fingering and a little finer than the Hygge Tveband), and I explored colourwork rather than texture. I upsized them and cast on 80 sts to make them bigger.  Here's the result:

[two-colour twined mitts]

These were fun to make as well - I really like the combined effects of colourwork and texture. Using colours that are close together (grey and white) makes the mitts a little less eye-popping. 

Since I used s-ply yarn, I twisted the two strands counterclockwise to unply the yarn as I knit. I see that I can't tell from the finished fabric that the initial yarn was s-ply rather than z-ply, and I didn't find the twisting action more difficult in one direction vs. the other...so why did the old-timers decide that z-ply yarn was preferable to s-ply for this technique???

I think it may have something to do with the yarn management. I found that while the yarn tangles with z-ply yarn, I could at least knit a few rounds of mitten before having to let the ball spin to get rid of the twist. Not so with s-ply yarn! After half a round, I had to spin the ball. Somehow the twist stays way up high, near my knitting hands, and gets nasty and tight really quickly. 

My younger son is about to head off for a 4-month internship in Saskatoon, and has requested a pair of full mittens in order to be able to cope with the -25C weather. So I'm off to produce another set! This time, I will try two-at-a-time, to see if I can get that working. 


Tuesday, January 2, 2018

Twined Knitting, volume 2

OK, now that I've knit a little bit of twined knitting, I've already learned some stuff.

1. This is essentially a "throwing" technique. It's also butt-slow. 

I am lucky in that I can knit using "picking" and "throwing" techniques (ie. "continental" and "english" style) with equal facility, so I've been able to try both on this technique. And I find it much easier throwing - and if you can support that RH needle, so much the better. I thought at first I could pretend I was doing colourwork, which I find easiest/fastest by continental-style "picking", but quickly found it impossible. It's because you have to constantly twist the 2 strands together in the same direction, and you basically need to drop one strand to accomplish this. Hence the use of my right hand (since I'm right-handed), and the requirement to support both needles while my right hand is busy twisting yarn. I can see why this is limited to small objects (unless you are using pit knitting or a knitting belt or something, with ultra-long DPNs).

2. Get clear in your head which way you need to be twisting those yarn strands.

Roll 2 strands of yarn together with your thumb and forefinger:

[roll two strands together - 
moving thumb up in direction of arrow rolls them clockwise]

If the yarns look like the picture below when you've rolled them, you have z-twist yarn and you need to twist the strands together with the bottom strand moving up and over the top strand - like you did when rolling the yarns together in the photo above. If you translate this motion into holding a screwdriver with your right hand, you'll see it's a "righty-tighty" move. 

[2 strands of yarn, unplying as they twist]

If, as is more likely, the strands look like the photo below, you have standard s-twist yarn and you need to twist by having the top strand move down and over the bottom one. Try unplying your strands by moving your thumb in the opposite direction, in the picture above. This is the "lefty-loosey" screwdriver motion, yes?

[2 strands of yarn, plying together harder as they twist]

Play with this. Pick up your knitting and twirl the 2 strands around each other first one way, then the other, and you'll soon see which way unplies them. For z-twist yarns and the "authentic look" of twined knitting, you'll want to ensure the yarns twist "righty-tighty" during both purling and knitting. For s-twist yarns you'll need to do "lefty-loosey" during both purling and knitting to get the unplying effect - and note, this means you won't be doing the twists the way that Knitty article tells you to do it!

As I mentioned in volume 1 of this series on twined knitting, the twist is a personal preference thing. A "compact" yarn produces a fabric with a different drape and loft, and the stitch definition will be slightly different than if you knit with an "open" yarn. Try a small sample using each twist direction to see which you prefer.

I found it useful to do this unplying test as I started knitting/purling, so I could get the twist going in the right direction...which brings up...

3. Yarn management becomes an issue within seconds. 

Because of all the twisting, you get a tangled mess pretty quickly. Best tip (thank you Principles of Knitting!): use two ends of a center-pull ball, ** pull off a "wingspan" or generous double armslength of both strands of yarn, and then clamp the two ends to the ball using one of those bulldog grips (or a clothespin, or a short knitting needle stabbed in and out a few times to trap the strands) so they can't unwind more. When you've used up the wingspan of yarn, dangle the ball so it unspins, unclip the yarns, and repeat from **.

[clamp the yarns to the ball using a bulldog clip]

Don't be shy about unwinding that "wingspan" - I've found it helpful to have at least 1m or so of yarn "free" at all times. With z-twist yarn especially, I'm unplying it as I knit and it helps to have the extra yarn free to "regularize" the twist. I've found that knitting straight-up twined for a few rows really makes things twisty, and that throwing in the odd crook round really helps decrease the twisting.

Wednesday, December 27, 2017

Twined Knitting, volume 1

I've seen several writeups about the technique of "twined knitting", also known by its Swedish term "tvåändsstickning" or by the equivalent Norwegian term "tvebandsstrikking". It has been written up in Knitty here (with a pattern, here), and there are several YouTube videos showing the various stitches (knit, purl, and so-called "crook" stitches).

Twined knitting is done with two strands of the same (often even same colour) yarn, and with every stitch you twist the two strands around each other. Unlike stranded (colour) knitting, the yarns are twisted constantly in the same direction, never untwisting. The backside of twined knitting looks quite different from fair-isle colourwork - it's much denser. Knitting with two strands allows you to play games with loops of yarn from the strand you're not using, which leads to some fun textures. Also, because it's double-thick, it's very warm (and windproof, if done at a tight gauge, as is traditional).

You are traditionally supposed to  twist the yarns in the opposite direction to which they were plied, so this action slowly unplies or opens up the yarn. This apparently makes the end product trap more air. I think it probably also enhances felting. Traditionally, the technique employed so-called "z-twist" yarn (for spinners: spun clockwise and plied counterclockwise) and the twisting was done by lifting the strand from the second-to-last stitch knit over the last stitch knit (ie. twisting the two yarns clockwise) on the back.

Nowadays, this type of yarn is hard to find, and most yarns are "s-twist" (for spinners: spun counterclockwise and plied clockwise).  But, I was at Vogue Knitting in early November, browsing the vendors, and I came upon The Yarn Guys booth, where I chanced upon an American-spun special z-twist yarn (Hygge Tveband Sport) especially meant for this type of knitting. So I bought a couple of skeins....hence this series of blog posts!

[on the Left: good old regular "s-twist" yarn. Note that the strands lean LEFT, 
like the middle part of the letter "s".
on the Right: special-snowflake "z-twist" yarn. Strands lean RIGHT,
like the middle part of the letter "z".]

Z-twist yarn is hard to find. Hygge Tveband Sport is milled to spec for the Yarn Guys and it isn't cheap (count on $50 for a couple of skeins - enough for 2 pairs of mittens - shipping incl). Contact them directly and they'll send the stuff to you.  I've only found one other called Mora, which is sold by Nancy Bush at Wooly West (I've never ordered from this site). Note that I'm not talking about the Malabrigo Mora yarn of the same name.

But, if you want to use "regular" yarn (s-twist), hey, no problemo! For the most authentic effect, you just need to twist the strands counterclockwise on the back of your work: ie. bring the second-to-last stitch thread under the last stitch knit.  This action then has the same effect : it gently unplies your yarn.

I'm not making this up, this info is from that eminent bible :  Principles of Knitting by June Hemmons Hiatt, who lists her sources. But I do I note that the point of unplying your yarn is not discussed in the Knitty article, nor is it mentioned in any of the videos on YouTube that I skimmed. In fact if you use the traditional "clockwise" twisting actions meant for z-twist yarns and shown in the Knitty article, or demonstrated on YouTube, on readily-available s-twist yarn, you will compact your yarn rather than opening it up...this is a picky detail, obviously, but it matters to some kntting geeks (ie. me). Compacting your yarn will affect the stitch definition and the final drape/loft of your fabric. It's a personal preference thing, so try both twist directions to see which you prefer!

Another, even more subtle, point is that regular knitting - even without twining - tends to unply z-twist yarns, making them rather unpleasant to knit with (this is the reason millspun yarns are s-twist).  So twined knitting with z-twist yarns delivers a double whammy of unplying. Again, this will matter only to knitting geeks. I'm really wondering why the good knitters from way back settled on z-ply yarns and clockwise twisting, rather than standard s-ply and counterclockwise twisting...will have to do some experiments...

I'm knitting up some twined mittens now. And I'll be posting on what I learn as I go.


Monday, November 20, 2017

Chain or Navajo Plying

Sometimes - OK, for me, rarely - you want to maintain the striping nature of space-dyed roving. The usual technique is then that you use so-called "chain" or "navajo" plying, creating a three-ply yarn that maintains the colour sequence of the single, and produces a variegated yarn rather than  one that is"barber-poled".

Admission: my chain plying sucks. Mostly because I get no practise at it, since I'm not a big fan of self-striping yarns. But also because I suspect my technique simply isn't very good.

I recently came across an excellent video, that features Sarah Anderson showing you how she executes chain plying. It was a revelation to me. I tried doing it her way, and found that the positioning of her hands really helps the process. I used to pull out each loop before plying it, leading to a jerky, and hence uneven, plying job, but her way of doing it is much smoother and makes a better yarn.

One trick is that you need to have the right tension on your single. A tensioned kate is really indispensable here. You need a tension that will feed easily enough so that you don't break your single (it's a pain to deal with broken singles in this technique!) but not so loose that the loop in your chain goes all squirrely. I tried my cheap version of a tension box - weaving the single through the rails of a rail-back chair - but this is hard to make adjustments to once you're set up, so doesn't work as well at all.

In the video, it looks like Sarah is wearing a skirt, and her single comes from her right on the floor somewhere, but I find it easier to wear pants so I can feed the single up between my legs. That way my hands are naturally positioned in front of me, and they stay there.

Another tip is that chain plying does not "average" the thick/thin variations of your single well. On the contrary, it tends to emphasize irregularities! So if you want even yarn, then you need to be able to spin a nice, consistent single first.

The last tip is that I tend to overply using this technique - the hand motions required slow me down considerably - so I find that I need to do this on my slowest whorl, and treadle gently. This is hard for me to do, because I'm so used to speed (I usually spin and ply on my highest whorl, double-drive style). Perhaps if I practise this more, I can get faster...

Anyways, my first try after watching her video resulted in a much improved yarn. Still a bit overplied but clearly I'm getting better!

[slightly overplied, but much improved, chain plied yarn]


[here's what I made from it. You can see the self-striping in action.
pattern: slightly modded Kindness Shawl by Jaala Spiro, free on Ravelry]

This is now a technique that I'm willing to try more often!

Friday, October 27, 2017

Intarsia for Socks, v1

I have not done a lot of intarsia knitting in the round - when I do it, it's not very neat - but I have experimented a bit with in on sweaters. The basic trick with intarsia in the round is that it's not actually in the round. It's flat knitting, done back-and-forth to a skngle stitch, the magic "turnaround point"...so lots of purling involved. To make the knitting round (ie. a tube) you hook the start and end points together by winding the yarn ends around each other. You'll see how in the linked video below.

While I was OK with the result of the one intarsia sweater I designed, I never cracked a book or YouTube to see how anyone else had solved the problem of making a nice turnaround point - with the obvious result that my turnaround point wasn't all that it could be! 

Then recently I came across a few simple intarsia sock patterns on Ravelry, which passed on this super video demonstrating a clever way of doing intarsia in the round. So now of course I've got to try it!!

The simplest intarsia pattern is a single solid stripe up the front of a sock, and if you are new to intarsia in the round that's what I'd recommend. That way, there are only 4 ends to darn in (one in each colour at the start and finish of that stripe). I say this because of course my first try has been more complicated - I got inspired by this pattern and decided to imitate it and also to see if I could do it two-at-a-time! 

Note: because I didn't actually use her pattern, my design is a bit different: the stripes are an odd number of rows high, spaced out by a different number of rows, and I don't follow the "rule of thirds" in placing them...

And yes, I figured it out. And I have about a million ends to deal with! Urk.

So here are some tips.

1. as I said, for first-timers, best is to try a plain sock with a single solid contrasting stripe up the middle of the front (or back) of the sock. It's easiest if the two socks are identical (ie. if you offset that stripe to one side of the sock, you might prefer to have mirror image socks instead, which of course are then not identical - and that takes just a little more thinking to get right).

2. WATCH THAT VIDEO BEFORE DOING ANYTHING. Pay attention to what she calls the "turnaround point" - where her marker is.

3. Start your sock(s) - either top down or toe up. Once you get to the point where the intarsia starts, you will need to arrange you sock(s) so that the turnaround point is the start of round. For 2AAT socks, this means the needles come out of the sock at the turnaround point, see picture below. My marker (if I used one) would be hanging in the air between the front and back needles. Note how the colour blocks (ie. the stripe!) start with the first stitch on the front needle! Because I'm doing 2AAT using magic loop (two circs would be similar), I'm not using a marker. My needles always indicate the turnaround point. But feel free to use one! *** see footnote

[sock positioned so that last stitch on back needle is where I turn around]

3. You might try on a single sock first, with the YouTube video playing in front of you, as you get the idea established in your brain. Then put the sock on a holder and start the second one. Once it's the same length, get both socks on the needles with the turnaround point in the right place, and you can proceed 2AAT. If you are doing a stripe down the front of the sock, both socks will be arranged slightly twisted on your needles - the first stitch of the stripe has to be the first stitch on the front needle for both socks!

[now I've got both socks arranged on the needles for 2AAT. 
Note that the two socks are twisted differently;
these socks are mirror images of each other because the blocks are off to the side]

4. yarn management becomes an issue pretty quickly. For my first try, I had only 2 colours per sock, so I put each smaller ball (for the intarsia stripe) inside its respective sock as soon as I could. Really cuts down on the tangles. If you are doing cuff-down, try pinning a sandwich baggie on the inside of each sock to hold its yarn.

5. I always joint new colours using a slipknot. This allows me to snug the new yarn up nice and tight, and allows for adjustments later. A slipknot also undoes rather easily, so when time comes for weaving in the ends I can unpick it, adjust the tension, and weave in. See the photo below.

[join new yarn using a slipknot for easy adjustment]

6. If your intarsia pattern continues over the instep, when you get to the heels, you will need to reposition your socks on the needle(s), to remove that twist. The start of row needs to be at the side of the sock to make the heels properly. Then, when you're finished the heels, reposition again if your patterns calls for more intarsia. 

[done!]


*** OK. To be completely honest, you can put your turnaround point anywhere you like on your socks. But you need a ball of yarn for every time you change colour between the start of your row and the turnaround point. So by judiciously positioning your turnaround point to start with a new colour like I demonstrate here, you cut down on the number of balls required by 1. It's a tradeoff between the number of balls of yarn to manage, and repositioning - you can add 1 more ball per sock of the main colour and then can have the turnaround point at the side of each sock, just like usual.

Saturday, September 9, 2017

Mosaic/Slipped Stitch Practise

I'm a big fan of slipped stitch/mosaic knitting for socks. It's a way of getting that fair-isle look without having to worry overmuch about the tension. Slipped-stitch patterns are a bit tighter (and thicker!) than regular stockinette, so you do have to watch your tension a little (I usually use one needle size larger than I'd usually use - so a 2.25mm rather than a 2.0mm), and my socks turn out well.

I'm not sure what the official definition of "slipped stitch" patterns is versus "mosaic" patterns, but my working definition is that slipped stitches are the technique, and mosaic knitting is a particular group of designs made using the technique of slipped stitches. Barbara Walker's stitch dictionaries feature pages and pages of what she terms "mosaic knitting", and I've noticed that one commonality is that these patterns feature TWO ROWS of knitting/slipping per colour. So perhaps that's how she classifies them? There are also lots of pages of what she calls "slipped stitch" designs, that don't seem to share this feature.

Anyways, what you call these patterns is neither here nor there. They work great for socks!

 When I first started exploring these stitches I made a scarf, which was great fun to do and didn't take long. I picked some fun-looking stitches from various sources. Here it is:


[mosaic scarf]

It's done in three colours (this one was from some alpaca yarn from KnitPicks, which is rather sheddy but very soft and warm) - I find that using a limited number of colours ties the design together in a pleasing fashion.  The basic idea is 8x8" sampler blocks separated by garter rows and finished with a few rows of garter edging. It's not very long (it's more suitable for manly crossover-type wear rather than a wrap-around-your-neck style), although you could easily add more sampler blocks to make it as long as you want. 

Anyways, download the pattern for the thing below, and make in time for the holidays!

Saturday, January 7, 2017

Depilling Experiment

I tend to prefer "rustic" yarns over soft ones like merino, polwarth, cashmere, angora, and alpaca, because I find these fine fibers start to pill terribly after a while.

Here's an example. This is a home-spun, handknit cardigan I did about a year ago. It has about 50% merino in it - the blue colour, especially, has  high fine-wool percentage (75% merino/polwarth). The higher percentage, the bigger the tendency to pill.

[handspun, hand-knit cardi (my own design)]

After only a year of wear, the underarm areas (on sleeves and body) as well as the bottom blue band, are really starting to pill fairly badly:

[pilling under the arms...]

[...and along the bottom]

The sweater has lost its "dressy" appeal for me.

After reading up on pill removal, I did some experiments using:
1. a hair clipper (the kind I use for my husband's hair),
2. a battery-operated device that supposedly sucks in the pills and cuts them off,
3. a cheap comblike tool with a very rough metal surface, called a "d-fuzz-it" and I think made by Dritz, costs like $3, and finally,
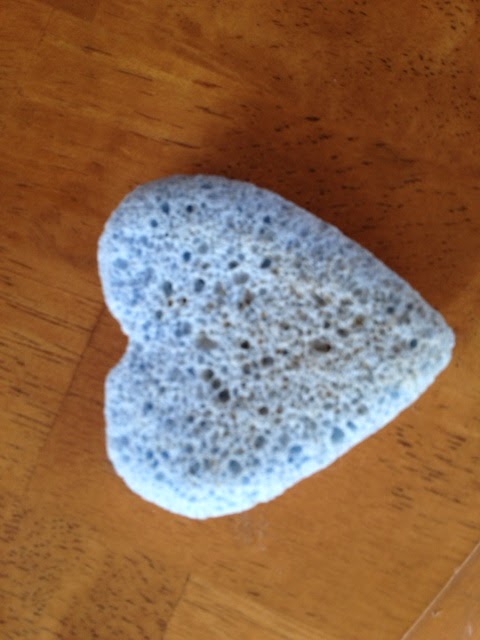
4. a piece of pumice ("sweater stone")

[hair clipper]

[battery-operated defuzzer]

[D-Fuzz-It comb]

[piece of pumice stone - don't ask me how they made it blue]


The only one that worked well was item 3.

The hair clipper / beard trimmer is scary to use, you have to watch like a hawk that those blades don't get too close to the knitting. Then, the fluff that it does chop off just stays on the sweater (and sticks) so it doesn't save any work from just picking off the pills by hand.

The batter-operated vacuum thingy is worthless on bigger pills. It doesn't have the strength to remove anything. Don't waste your money.

The comblike tool  has a rough surface that collects the pills. It requires a firm hand, you scrape across the sweater and it collects fluff. It works extremely well. It takes a lot of stuff off, and yes, this wears out the sweater. "Pilling" is "wear". In other words, fine wools don't wear well. Which, I remind you, is why I'm not a big fan...

The piece of pumice (a type of volcanic stone that's also used to remove callouses from your feet, I got it from the manicure section of my local drug store for a few dollars). You rub it across the sweater. More expensive are "sweater stones", which are exactly the same thing in block form. I found this thing very effective as well, but it was much more awkward to hold and maneuver across the sweater. It also felt much more aggressive than the comb and seemed to remove more fuzz.

But, after once-over with the defuzzer, my sweater is looking much better.

[...after a go-over with the sweater "comb"]

[...no more pills!]

[Here's the pile of fluff I took off the sweater]

I'm now going over all my "soft" sweaters with this little thing. It's going to live in my top drawer!